Wednesday 15 May 2013

Lambretta Mudguard And Horn Cover

So close
And yet
So far
Is it just me or does this seat look great against the green

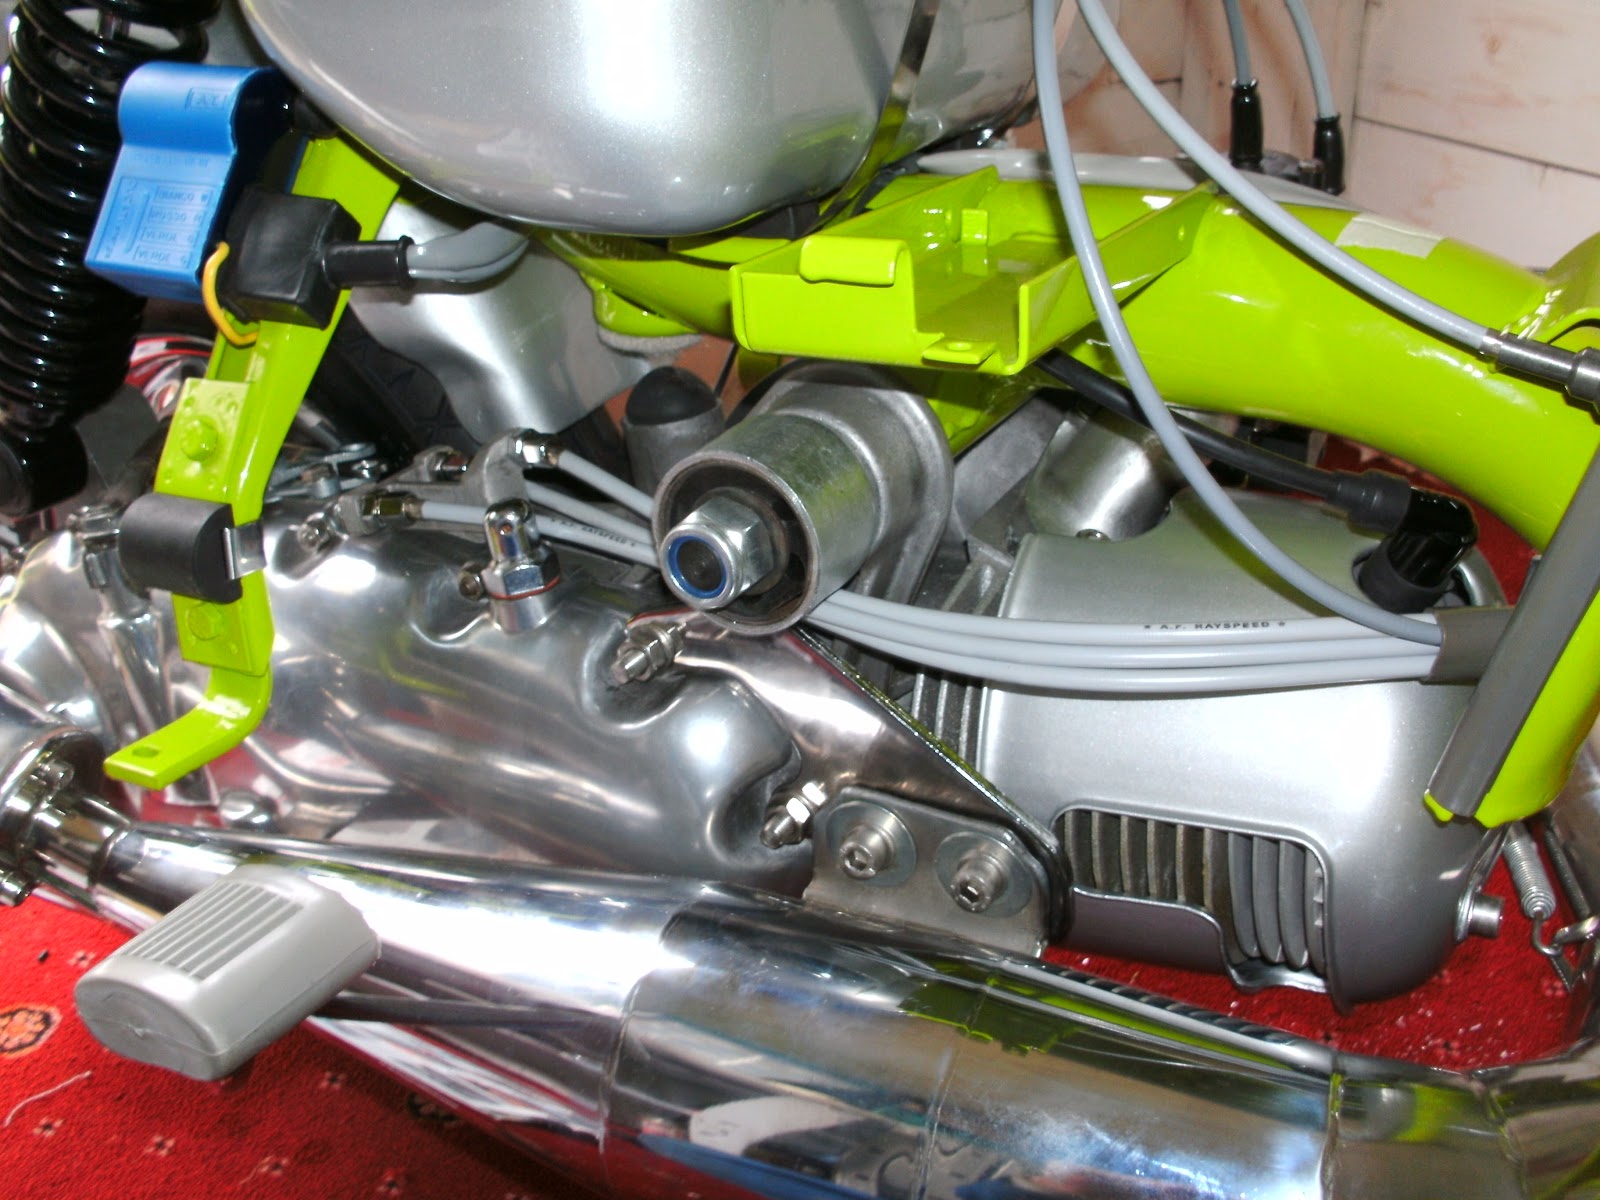
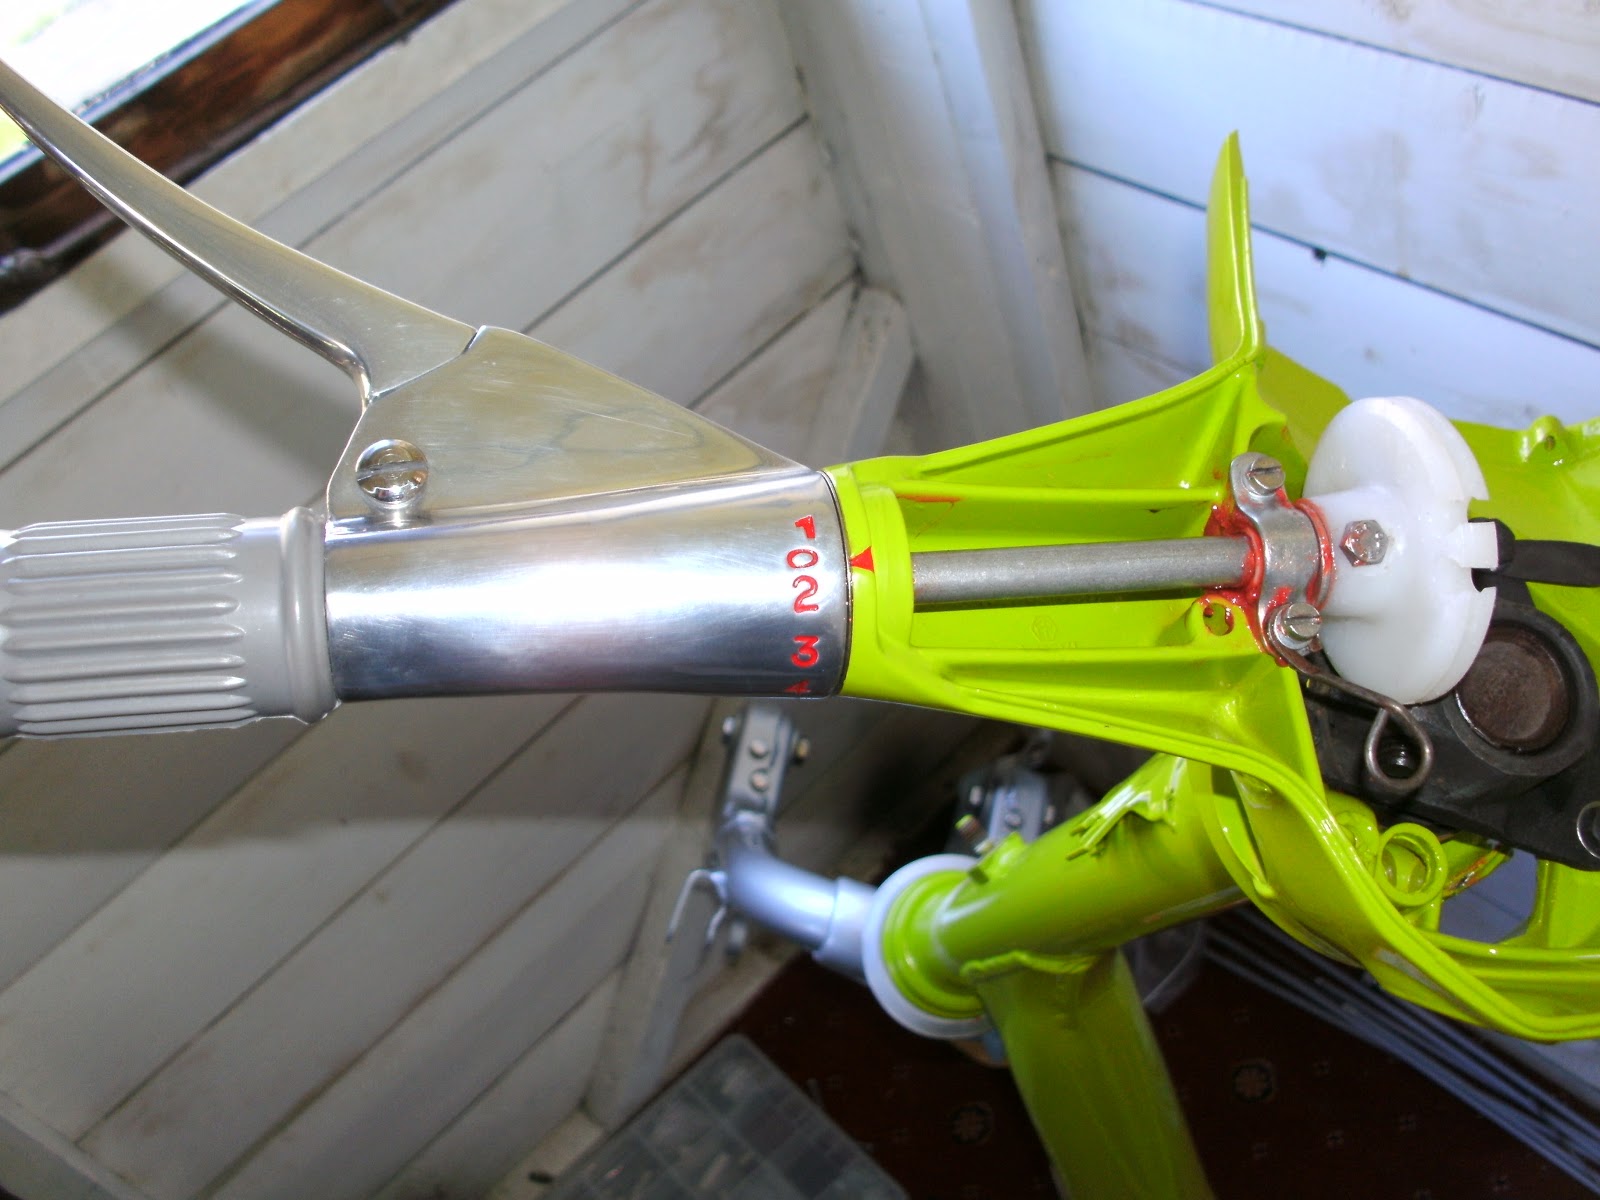
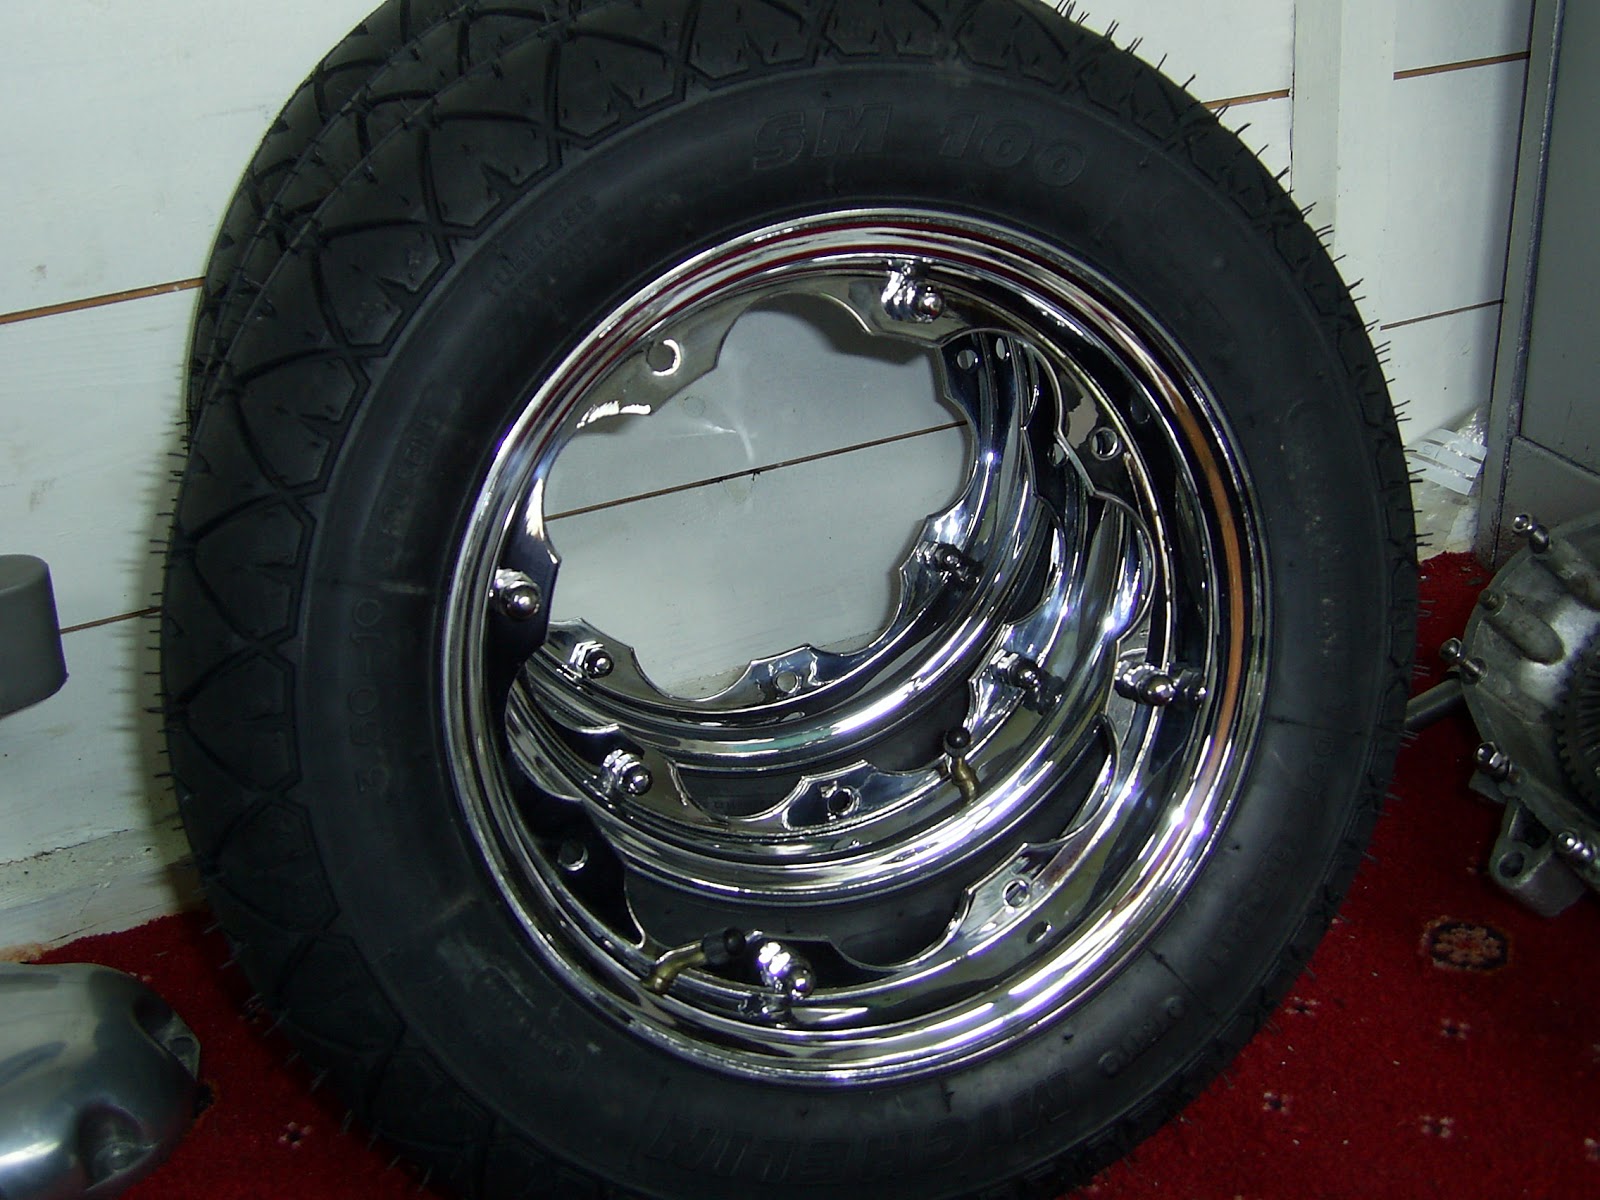
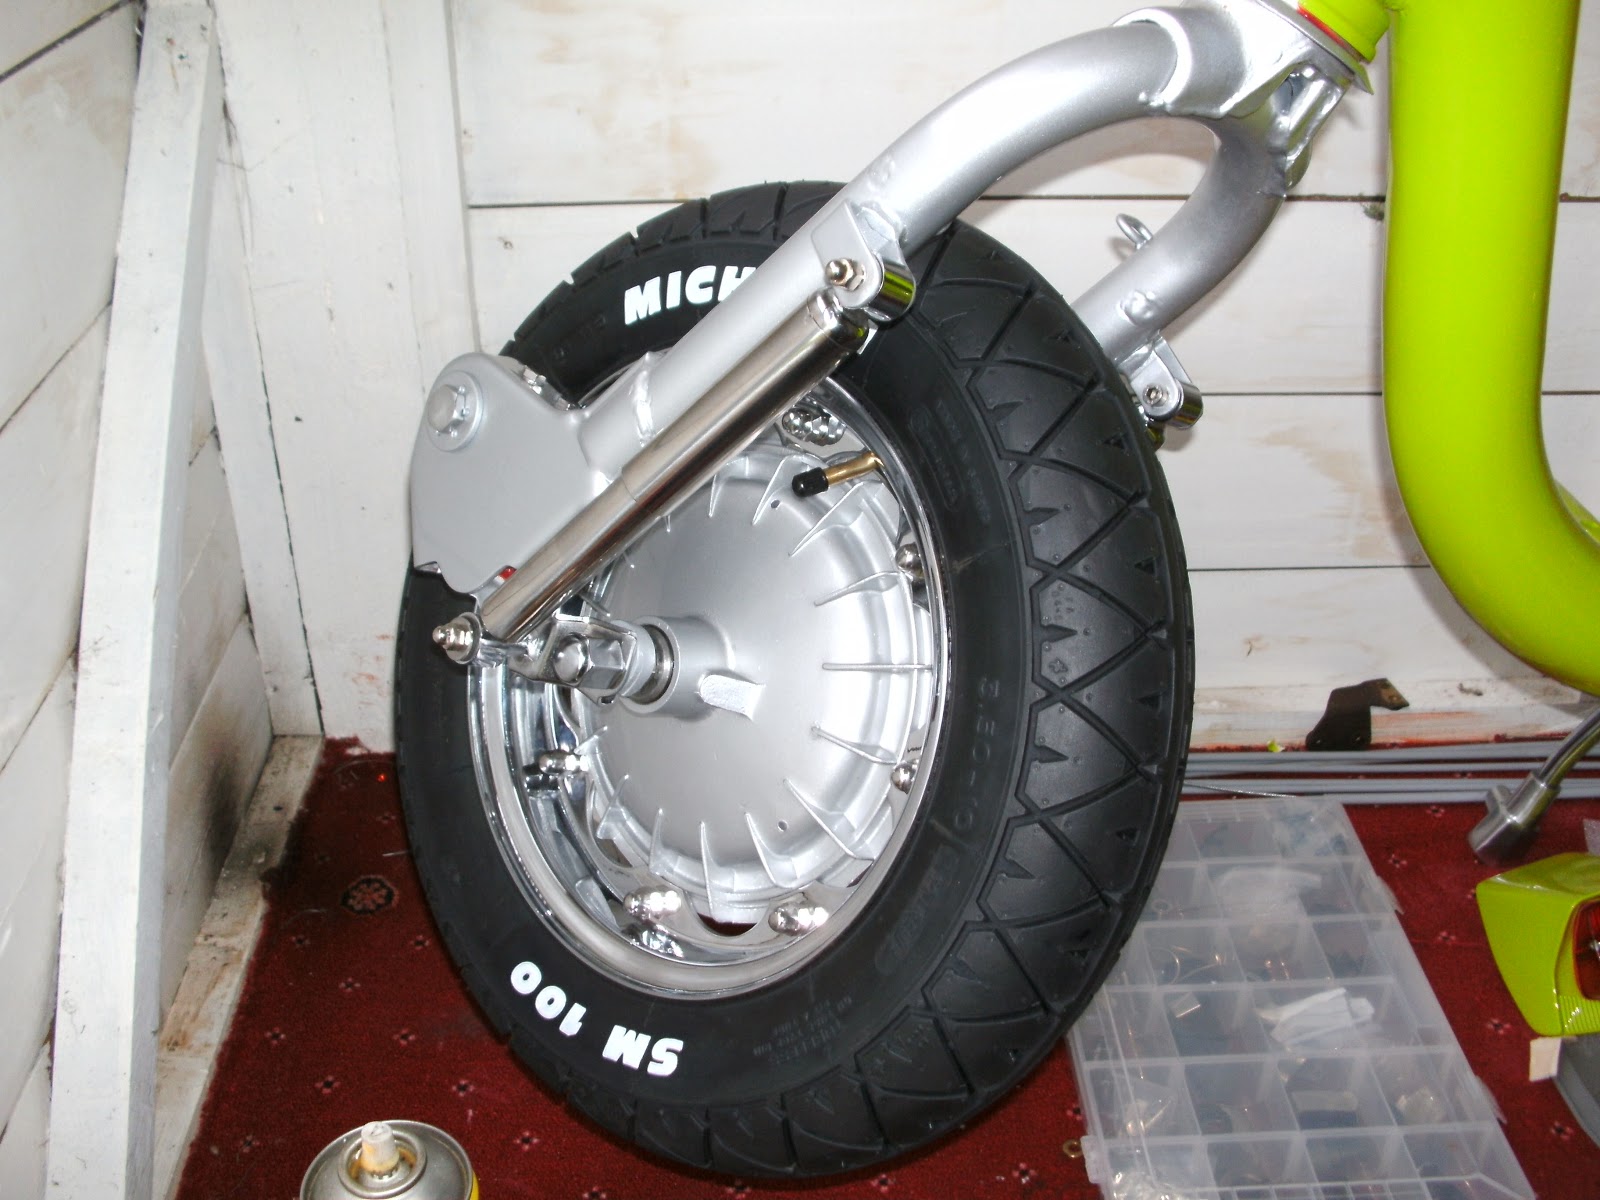
More bits on, it's definitely looking like a scooter now. It's a great feeling when you get to this stage with a build and everything you hoped it would look like is there in front of you. It makes all that money you spent and all the time you've lost all worth it.

Thursday 18 April 2013

Lambretta Legshields

legshield trim fitted
The horn came from a vespa

Putting on the legshield trim was nerve racking. If you ever decide to fit this style of trim you must try it on before painting because I have no idea how you are supposed to do it without scratching. As I did test fit it all turned out fine. Another tip is not to bolt anything down fully when fitting the legshield's as you will need to be able to move them around so you can aline it up the other bits like the rear floor boards, honecover and so on.

Thursday 4 April 2013

Serveta Tool Box

The original choke and petrol tap were just cleaned up
Serveta's have to share there tool box with the air filter 

Some more part's fitted including the seat that I think looks fantastic against the green. Also fitted is the toolbox, are as everyone I know calls it a butty box. I don't no why Serveta decided to put the air filter in the toolbox maybe it was down to costs? Mind you I do like the louvers in the door.

Thursday 21 March 2013

The Day The Lambretta Became Alive


Do you know when you get so involved with something and you forget to do others things you were supposed to be doing, well this is an example of it. I forgot to take any pictures of getting it running and setting the timing with the strode light. So yes I got it running but that was not all that ran, the fuel out of the overflows on the carb also ran out very well. I will be replacing the carburetor with a new one later.

Thursday 14 March 2013

Lambretta Tank And Cables

Tank in 
Routing the cables

The tank went in next with stainless straps holding it nice and tight against new rubber supports all topped of nicely with a fresh fuel catcher and cap. As usual all the parts courtesy of ScootRS. Apparently according to the manual it is important to install the cables in the right place so who am I to argue with that so I started to route them temporarily holding them in place with tape

Thursday 7 March 2013

The Lambretta Wiring

A few things done
Lots of wiring
26mm dellorto 

It took a bit of working out when it came to the wiring probably a bit my fault. The stater was a BGM unit, the cdi and the voltage regulator were ducati, the loom was from ScootRS. And the ignition and light switch came form Scooter Restoration. The problem was that the colours of the wires didn't match up so I had to work out each part individually. The back end of the scooter wasn't to bad the problems started in the headset. I think in heinsight I should have ordered all the loom and switches from one place and made sure they supplied a diagram. The loom did come with a good diagram but ScootRS don't sell an ignition switch that has a side light position. In the end it did all work perfectly and I have had no problem with it ( touch wood ) so yes it probably was a bit my fault.

Sunday 3 March 2013

Lambretta Engine Goes In

Loom temporary taped to the frame
It getting to look like a scooter
i will be replacing the rear shocker
I made a bracket to hold the cdi unit in the position
that serveta puts their coils

The day came to put the engine in, first I taped the loom on to the frame in it's right position then after putting the scooter on its side in it went all nice and easy. Such an easy job but a big milestone.

Monday 25 February 2013

Lambretta Headset and Wheels

All new gear controller 
The regulator box fits on the original mounts
Repositiond the ingition switch  to the headset
ScootRS chrome rims with Michelin SM100 tyers
70s Style 

As mentioned previously the headset that came with the scooter was knackered so I had to start again. Lucky a usable headset was sourced that was fitted with ScootRS gear controller and throttle support and a rod kit from eBay. The original headset steering clamp was black metal treated before fitting. I am not a fan of where serveta puts there ignition barrel on the back just above the side panel. All that happens is the keys swing around and damage your paint work and its dead funny for your mates when thay come up behind you and switch it off, not very funny when you are sat at the traffic lights, that's why I put it back were it belongs

Wednesday 13 February 2013

Lambretta Stand

Stainless steel splash guard
Nice thick stand brackets

First thing done
Forks in

When I stripped the frame I noticed that there was no splash guard fitted, maybe that's how the Spanish did things. I decided to put one on along with a new stand and fitting kit all from ScootRS. The forks had a new race and bearings fitted .

Saturday 9 February 2013

Lambretta Paint 2

No problems on this side
Simple but elegant lines
Replacement headset
Horncover from scooter republic
legshield always hard to set up for painting
Looks like i painted the floor green

Spare wheel will cover most of this side
Now all i have to do is put it together without scratching it

I have been thinking of doing a blog on how to do bodywork and painting in detail, I'm not sure yet. Well anyway after rubbing down all the parts the day came to start the spray job. It's always a bit nerve racking getting ready to paint because of all the things that can go wrong and all that time you have spent getting to this point. Luckily on the day it all went well. Next job was to put it together.

Monday 4 February 2013

Lambretta Paint 1

Setting up panels
Wow Bright
You can catch every where
Panels look a little wobbley on this side

Apple green. Well my idea of apple green. You see on the back of stickys Lambretta book there is a picture of an Sx150 that I kept looking at, I was originally going to paint it white but I could not get that picture out of my head. So I thought blow it I'm going to paint it green. I matched the colour by eye from the back of the book making it my interpretation of apple green and therefore not sticky accurate. As you can see I have painted the under sides of the parts, this makes it much easier later when painting the top as you don't need to worry about catching all those hard to get place's so you can concentrate on getting the best possible finish you can

Sunday 27 January 2013

Lambretta Dry Build 2

Clip on panels with no handles

Stainless runners in favour of the rubber mats
Leather seat

On ScootRS website they have a thing called countdown, this is were the seat cover came from. Countdown is that the price of an item starts at the rrp and drops until someone buys it. Unbelievably I won this genuine leather seat cover for £15 including uk delivery. The cover is brilliant quality I would happily have paid full price. I also purchased one of there seat spring kits which when put together it became this beautiful looking seat.

Wednesday 23 January 2013

Lambretta Dry Build

Starting to look like a lammy again
I was getting very excited at this point
Shine things

There is a bit of a gap in my pictures here, not sure why but it must have been because I primed all the parts independent of each other I just didn't take any. Right as you can see it's white but that's only the colour of the primer. I always do dry builds on every restoration, you can check if everything still fits together right and this is the last time you can drill hole's. I also try on all the nice new things so I can see if all my plans are working and if the parts are good enough. I made the decision before looking for a Lambretta that it was going to look the way I wanted and I do know it's not an original restoration. I don't think I will be able to afford another one and I'm not trying to pass it off as a TV or a SX. The mudguard and horn cast are repo sx/tv from the Scooter Republic on eBay the mudguard was excellent but the horn cover needed a bit of work. All the other bits came from ScootRS the legshield trims took a lot of work to get right but I'm glad persisted