Sunday 27 January 2013

Lambretta Dry Build 2

Clip on panels with no handles

Stainless runners in favour of the rubber mats
Leather seat

On ScootRS website they have a thing called countdown, this is were the seat cover came from. Countdown is that the price of an item starts at the rrp and drops until someone buys it. Unbelievably I won this genuine leather seat cover for £15 including uk delivery. The cover is brilliant quality I would happily have paid full price. I also purchased one of there seat spring kits which when put together it became this beautiful looking seat.

Wednesday 23 January 2013

Lambretta Dry Build

Starting to look like a lammy again
I was getting very excited at this point
Shine things

There is a bit of a gap in my pictures here, not sure why but it must have been because I primed all the parts independent of each other I just didn't take any. Right as you can see it's white but that's only the colour of the primer. I always do dry builds on every restoration, you can check if everything still fits together right and this is the last time you can drill hole's. I also try on all the nice new things so I can see if all my plans are working and if the parts are good enough. I made the decision before looking for a Lambretta that it was going to look the way I wanted and I do know it's not an original restoration. I don't think I will be able to afford another one and I'm not trying to pass it off as a TV or a SX. The mudguard and horn cast are repo sx/tv from the Scooter Republic on eBay the mudguard was excellent but the horn cover needed a bit of work. All the other bits came from ScootRS the legshield trims took a lot of work to get right but I'm glad persisted

Lambretta Engine Rebuild Part 5

Ready to fit
In all its glory

Newfren shoes

Well that's the engine done. Not pictured is the hub, unfortunately the original serveta one had been taken off and replaced with a completely nackerd one before I bought the scooter, apparently the genuine serveta one's are the best there is so it's no surprise it vanished. The best I found was made by uni but be careful there are a lot of dodgy hubs out there that can let go at any time.

Sunday 20 January 2013

Lambretta Engine Rebuild Part 4

Af kit, bgm 120w stator and lightened gp flywheel fitted
timing marks made
Dial gauge to find tdc
Asso Piston 

Something I noticed when matching the base gasket to the barrel was that a standard gasket isn't up to the job, so after looking around I found that scooter restorations listed thicker better fitting ones for the sr kit's. After fitting the barrel I used a dial gauge to find tdc and a timing disc to set up the timing as described in stickys book (This book is the first thing you should buy if you are planning on building a Lambretta) One more thing I think you should buy for any top end build you are doing are longer barrel studs. The ones I used were from mb development's, they are tapped further on both sides so they go all the way in to the casings and you still have ample on top

AF Rayspeed 175

Fiber gasket matched to port
Freshly honed
The casing were matched to barrel
Looking up the inlet port
skimmed head

This is a great kit. They start out as a scooter restoration Indian sourced kit which has a much superior asso werke piston supplied, and finally the factory stage 4 tuning is improved and polished.

Lambretta Engine Rebuild Part 3

This took a good few hours polishing 
All oiled up and ready to go
Home made tools doing there job
This is the way i soak clutch plates

When it comes to soaking clutch plates I have found it easier and cleaner to put them in a sealable food bag with a bit of oil and leave them for a couple of day's. It would have been easier to buy or even borrow all the services tools that were required but I thought I'd give making them myself a go

Lambretta Engine Rebuild Part 2

I had all intentions to use a 16 tooth front sprocket  
ScootRS chain tensioners were fitted 
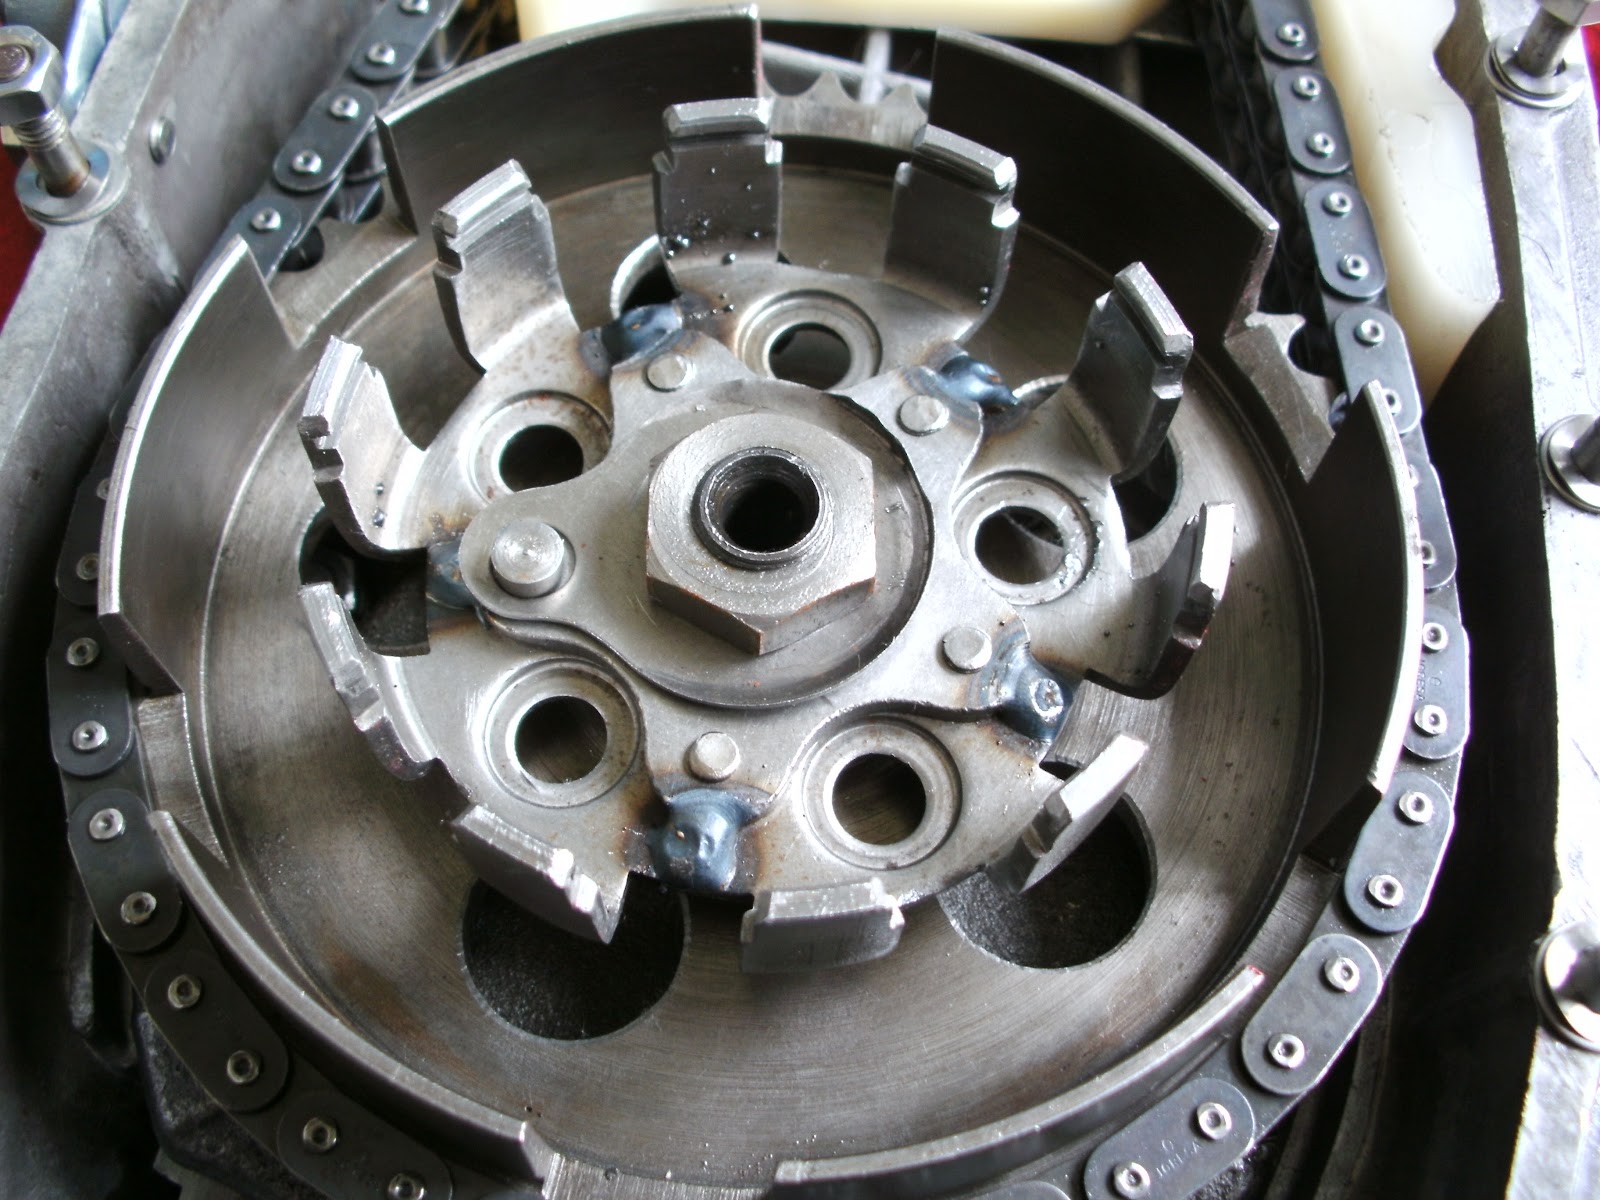
The clutch spider was welded

With the gearbox in it was time to fit the clutch housing, chain, tensioners and front sprocket. The original plan was to fit a 16 tooth front sprocket but when I tried to fit the original 80 link chain that I thought must have stretched enough over It came apparent I was wrong, so on went the 15 tooth instead. The thing is that turned out to be the right decision in retrospect as I'm not the 11 stone lad I was age 17 and the engine is setup to be much higher revving so if I had got it to fit I now believe it would have made the scooter slower

Tuesday 15 January 2013

A long time coming

Wow time fly's, it's been to long since I did an update. Well the lambretta has been finished and on the road for 10 months so it's about time to get on and do this blog. So I shall endeavour to get my arse in to gear over the next few months and catch up